05-23-2025, 12:24 AM
You might have already played around Glint photobooth or maybe this is your first time. Either way, there's a whole world to be uncovered with it, so get ready.
The basics:
When you are in glint, get familiar with the basic buttons you find on screen. I won't go into too much detail of the obvious ones because you can simply tap on them and find out on your own, and instead I will point out a few things that might be more obscure or people might ignore at the start.
1) Lighting button (visible when you are on the Background tab from the bottom of the page), there's a PRO toggle that you might think is paywalled. It's not. The PRO sliders are your friends.
2) From the buttons on the right, you can decide to rotate the camera or rotate and move the subjects. This will be extremely useful because your strategy will be using clipping between poses to create the final effect you want.
3) From the bottom of the page, you can access individual poses for you and your LI. These will consist of generic poses from the cafe, idle poses, etc. Your strategy will be using these in whatever combo to create the final effect you want. To get creative, most of the time you will ignore the DUO poses, or use only half of a single duo pose while the other subject plays another one.
4) Feel the orb, love the orb. From the Gaze button on the left, you can decide where the subject is looking. Using the orb allows you to freely control where they turn their head and eyes.
The templates:
Now we get into the real interesting stuff. You can already kinda experiment with what templates are by accessing the related tab at the bottom of the page. It will show you a slide show of possible photos you can create, and the interesting part is that each one of them will be like 2/5, 1/4, 5/6 etc. If you tap on one, it will tell you how many parts you have and are missing to complete the template. We're talking about clothes (arbitrary), backgrounds (arbitrary), poses (necessary), etc. Remember this because it will be important.
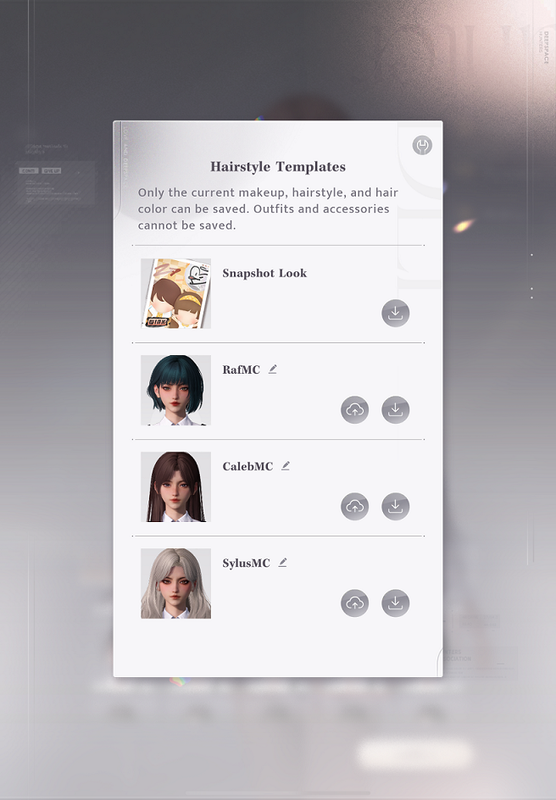
Learning how to work with templates requires time, what if you just want to take a pretty picture and slowly learn by studying what others do? Well, qr codes will come in handy here. You can export and import templates, which will save your characters' positions, poses, clothes+accessories, lighting, sfx etc.
When you're in the template tab, if you look on the left right above the template window, you'll see two very important buttons: Share, and Import template. Share will generate a qr code that you can give other players so they can use your template, whereas import does just that. If you want to do that you'll have two options: scan with your camera (if you're on phone or ipad), or access the gallery so you can feed the game the picture with the qr code on it and it will do the job on its own.
Which opens up a world of possibilities, because people really do things with templates lol. The sad thing is that sometimes you find a qr code but it's unusable because it's a screenshot of a screenshot of a cropped photo taken from a chinese forum, but often times you get functioning qr codes.
Reddit/tumblr/twitter has a lot of them, you can look for both the "template" and "qr" keywords. Pinterest is an even easier search.
Group Poses:
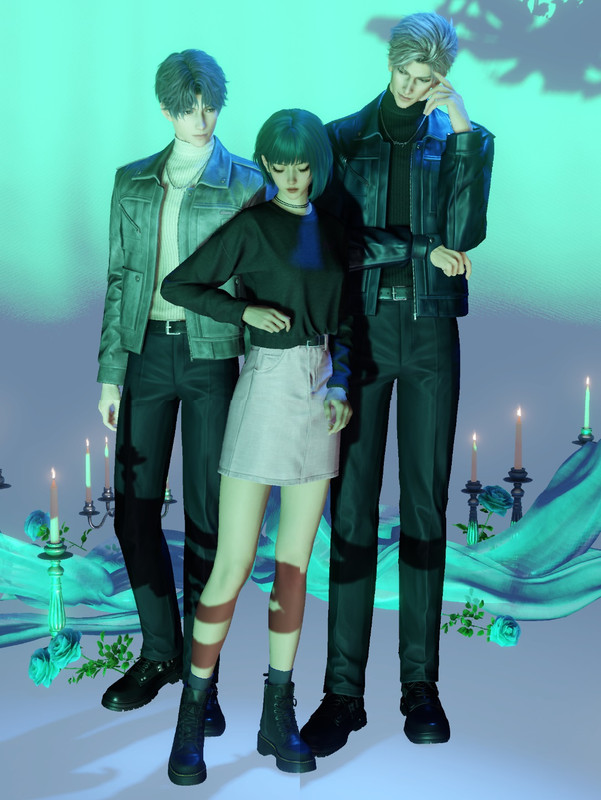
This deserves a section on its own because it's more complicated, but allows you to create a final photo with MC surrounded by our boys, or make a collage of just the boys next to each other. The problem is that you can only get 2 subjects in the photobooth, and 1 of the 2 has to be MC. So the solution is to force it through the creation of a collage.
You can find a guide on reddit to take a classic 3 subject photo, another one to get all the LIs next to each other. There are some very good guides on tiktok, but if you're not there I'd say to work with what's here for now. I can make it into a proper photo by photo tutorial if you want.
The basics:
When you are in glint, get familiar with the basic buttons you find on screen. I won't go into too much detail of the obvious ones because you can simply tap on them and find out on your own, and instead I will point out a few things that might be more obscure or people might ignore at the start.
1) Lighting button (visible when you are on the Background tab from the bottom of the page), there's a PRO toggle that you might think is paywalled. It's not. The PRO sliders are your friends.
2) From the buttons on the right, you can decide to rotate the camera or rotate and move the subjects. This will be extremely useful because your strategy will be using clipping between poses to create the final effect you want.
3) From the bottom of the page, you can access individual poses for you and your LI. These will consist of generic poses from the cafe, idle poses, etc. Your strategy will be using these in whatever combo to create the final effect you want. To get creative, most of the time you will ignore the DUO poses, or use only half of a single duo pose while the other subject plays another one.
4) Feel the orb, love the orb. From the Gaze button on the left, you can decide where the subject is looking. Using the orb allows you to freely control where they turn their head and eyes.
The templates:
Now we get into the real interesting stuff. You can already kinda experiment with what templates are by accessing the related tab at the bottom of the page. It will show you a slide show of possible photos you can create, and the interesting part is that each one of them will be like 2/5, 1/4, 5/6 etc. If you tap on one, it will tell you how many parts you have and are missing to complete the template. We're talking about clothes (arbitrary), backgrounds (arbitrary), poses (necessary), etc. Remember this because it will be important.
Learning how to work with templates requires time, what if you just want to take a pretty picture and slowly learn by studying what others do? Well, qr codes will come in handy here. You can export and import templates, which will save your characters' positions, poses, clothes+accessories, lighting, sfx etc.
When you're in the template tab, if you look on the left right above the template window, you'll see two very important buttons: Share, and Import template. Share will generate a qr code that you can give other players so they can use your template, whereas import does just that. If you want to do that you'll have two options: scan with your camera (if you're on phone or ipad), or access the gallery so you can feed the game the picture with the qr code on it and it will do the job on its own.
Which opens up a world of possibilities, because people really do things with templates lol. The sad thing is that sometimes you find a qr code but it's unusable because it's a screenshot of a screenshot of a cropped photo taken from a chinese forum, but often times you get functioning qr codes.
Reddit/tumblr/twitter has a lot of them, you can look for both the "template" and "qr" keywords. Pinterest is an even easier search.
Group Poses:
This deserves a section on its own because it's more complicated, but allows you to create a final photo with MC surrounded by our boys, or make a collage of just the boys next to each other. The problem is that you can only get 2 subjects in the photobooth, and 1 of the 2 has to be MC. So the solution is to force it through the creation of a collage.
You can find a guide on reddit to take a classic 3 subject photo, another one to get all the LIs next to each other. There are some very good guides on tiktok, but if you're not there I'd say to work with what's here for now. I can make it into a proper photo by photo tutorial if you want.
![[Image: abyssw-alker-v0-wx0feo9sd3yod500x100.jpg]](https://i.postimg.cc/LXBKwXgL/abyssw-alker-v0-wx0feo9sd3yod500x100.jpg)
Time goes by but memories rewind